|
||||
|
Baby Nursery Painting Ideas
Need some ideas for baby nursery painting that are modern and unique? Look no further. How you paint your baby nursery provides the base for your entire baby nursery decorating theme. I want to let you in on some great tips to achieve enviable style in your DIY baby nursery.
Baby Nursery Painting - The BasicsWhichever way you choose to paint your baby nursery you need to know the basics. You need to know how to get started on painting the nursery. You want to come out of this with a nursery that looks professionally painted. Right?Right. Whether you intend to use decorative techniques in you baby nursery painting, or even painting a baby nursery wall mural, you will need to start by giving the entire room a new coat of paint.
 Tools and materials you will need to get started:
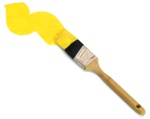
Start by clearing out the room you intend to paint. If there is already furniture in the room and you do not want to move it all just move everything to the center of the room and cover it with drop cloths. You will need a drop cloth to place under the section you are working on as well. It is usually good practice to wash the walls down with a sponge and warm soap and water before you start painting. Remove any electrical outlet plates and light switch covers. Use your masking tape to cover over the edges of moldings and windows. Also mask off where the ceiling meets the wall so that you do not accidentally paint the ceiling. It looks pretty messy when this happens. You want to begin by "cutting in" Cutting in is when you paint all of the outer edges of the room with a paint brush before painting the bulk of the walls with a roller. Basically you are going to paint about 1/2 a foot to a foot out from all of the edges you just covered with masking tape. This way when you paint with the roller, you do not need to get too close to the floor, ceiling, or moldings. You wouldn't want to accidentally paint the wrong places! Once you have the room painted you are ready to go ahead and get creative with your baby nursery painting!
Creative Baby Nursery Painting
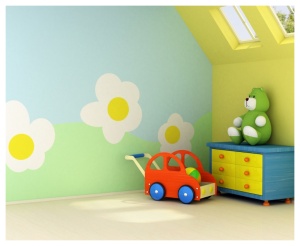
Maybe you want a modern look and feel to your baby nursery decor, but you do not want to go all outdoors when it comes to decorative baby nursery painting. I know, this is tiring work when your pregnant, and not everyone will have the energy for it. One way to get a great modern contemporary feel is by using color alone. Stray away from the predictable pastel pinks, blue's, and off whites. Opt for something bold and bright. Pick a color that is unexpected! If an entire room painted in hot pink is too much for you, take it a more calm direction and pick just one wall to accent. You can have three walls in a more muted color with one wall to punch it up! You can even calm that wall down a bit by placing some curtains with a more mellow color on the brightly colored wall, to calm things down a bit and tie everything together. Using Masking Tape There are several ways to utilize masking tape in decorative painting techniques. Wait for you initial paint job to dry and get to work... Create a faux chair rail This is a great way to divide up a room into separate colors. Again, say you want to use bright bold color choices, but not for an entire room. Just divide up the room with a faux chair rail technique, and only paint the bottom half of the room in a bright color. Paint the top half in a mute color.
Now ask yourself how thick you want the chair rail to be. Essentially it is only going to be a stripe painted along the wall. Repeat the same steps with the masking tape all over again a few inches above the existing tape. Now simply paint the upper portion of the wall one color, and the bottom another, be very careful not to paint in between the two strips of masking tape. Wait for the paint to dry and remove the masking tape. Viola! You've got a neat baby nursery painting technique that adds a nice pop of color to the room. Create Stripes This same kind of technique as the one outlined above can be applied to make vertical stripes as well. Or why not make the faux chair rail, and then add thick vertical stripes along the bottom of the room! Get creative! Create Stencils
 Of course you could simply go out and buy some stencils. People use stencils to make cute borders and accents. I am talking about making your own stencils and then stepping it up a bit.
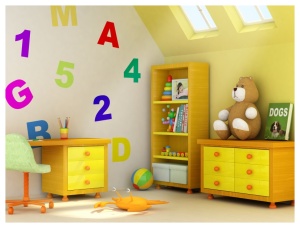
Instead of making cutesy little borders, why not make entire murals. Or strategically place a few shapes to match your baby's nursery theme. Here's how you do it. Search through books, go to the library, or even search the web. Come up with some cute pictures that will make great shapes for a stencil. Need some ideas? Think butterflies, dinosaurs, sunshine, flowers, the alphabet... Print out the pictures you like. Take your print outs (or book pages) to a local copy shop and have them reproduced and enlarged to a size that will look good on your walls. Get several copies. It can't hurt to get them copied onto slightly heavier weight paper as well.
Now that you have your copies you can create the stencils. Use a pair of sharp scissors or even an Xacto knife to cut the stencil out. There are two ways you can use them: You can either use the outline and paint into the stencil OR You can stick the cut out shape to the wall with some temporary adhesive and then paint over the stencil. Remove the paper from the wall and you have the shape left under it! You can indeed use this baby nursery painting technique in some very interesting ways if you get your imagination running.
Have you painted your baby's nursery lately? Painted a cool mural in your toddler's room? We'd love to see it! Inspire others or just show off your artistic skills.
go from Baby Nursery Painting Ideas back to DIY Baby Nursery Decor
|
||||
|
Enjoy This Site?
Then why not use the button below, to add us to your favorite bookmarking service? 


|
||||
| Template Design | ||||
|
| ||||

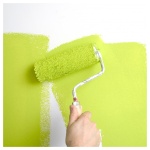 Once you have "cut in" all the edges go ahead and paint the rest of the room with a roller. Hopefully you will be painting this room as a team with Hubby so that while one of you is cutting in, the other can be painting with the roller. You'll get the job done so much faster. Plus, it helps to be able to switch jobs every once in awhile. It's particularly tiring doing this kind of work while you're pregnant. But don't worry you won't be able to help yourself but to get to work when you go through your nesting stage!