|
|||
|
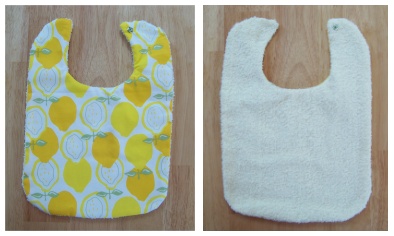
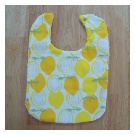
Make A Baby Bib
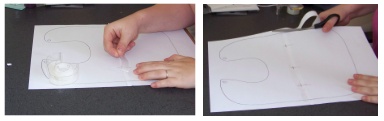
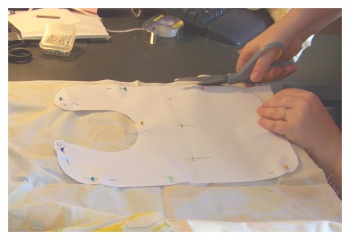
Those of us who are seasoned moms know that at some point a bib becomes a staple to your baby's wardrobe. Not just for feeding time, but when baby is teething and drooling buckets all day long. Or maybe you just have a baby that tends to spit up ALOT, where stylish and fashionable bibs can come in handy. I want to show you how you can make a baby bib easily; make em' stylish, and functional. I have even created a free printable baby bib patternfor you to work with. This bib pattern is designed to print onto 8 1/2" by 11" paper. The pattern itself is bigger than the sheet of paper, so you will need to print it out and tape it together.
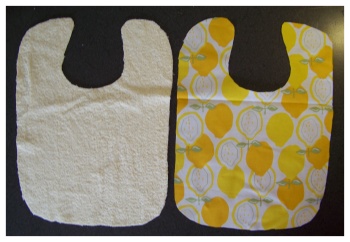
The other fabric you choose to make this bib with should be decorative. It can really be any kind of fabric you want, although I recommend using something less thick than the terry cloth. I used some simple cotton fabric with a nice bright pattern.
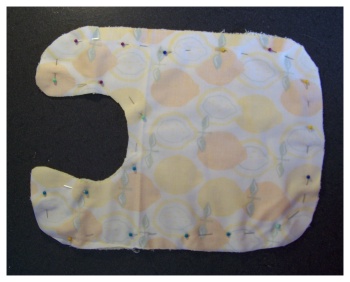
 Now sew the edges of the baby bib together stopping to leave about 2" open for turning the fabric outside in. Take all of the pins out and turn the fabric outside in. Sew the opening shut by hand. To make it look nice and clean fold the outer edges in while hand sewing. At this point it wold be a good idea to iron the fabric and the sewn edges to lay them flat and give it a finished look.
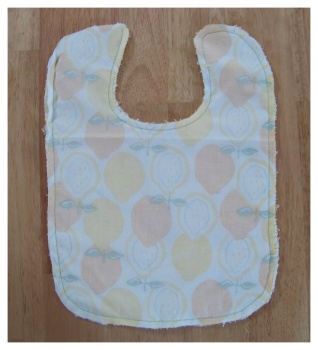
Some people like to add extra finishing touches when they make a baby bib. You can choose to sew bias tape around the outside edges for a more finished look and extra pizzaz. You could also sew around the outer edge about 1/4" in from the edge to add a border. I like to keep it simple and leave it just as is. A simple ironing is enough finishing for me. :) The last step is to simply add an enclosure to the bib. I like to sew on little metal snaps. Another really easy option is to add a little velcro.
|
|
||


Enjoy This Site?
Then why not use the button below, to add us to your favorite bookmarking service? |
|||
|
|
|||
|
| |||