|
||||
|
HOME
Site ContentsPrintable Baby Clothes Pattern
|
||||
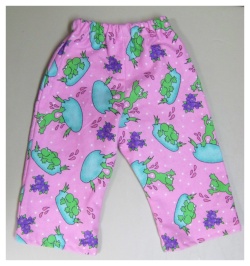
 This easy to sew baby clothes pattern is one that you will want to use over and over and over again! Make your own baby pants to fit every season and occasion. You can make bottoms for your little one in every fabric from denim to lightweight cotton to jersey cotton for comfy lounging pants.
How To Sew The Baby Pants
Begin your project by washing, drying and ironing your chosen fabric. Fold the fabric in half and lay on your work surface. Using pins or pattern weights use the baby clothes pattern to cut the pants from the fabric. You will have two pieces.Using a hot clothes iron turn the bottom hem over by about 1/2" and iron in place so that the right side of the fabric is facing inward. Fold the fabric over again and iron and pin in place. Sew a hem at the bottom of the leg. Repeat this for the second pattern piece.

Turn the fabric and match the seams so that the right sides of the fabric are facing. Pin in place and sew at the inner leg seam. Repeat this step so that both pattern pieces are sewn at the inner leg seam.

Turn one leg piece so that it is right side out. Tuck one leg inside of the other so the seams are matching. The leg piece that is not inside out should be tucked into the middle so that the wrong side leg is facing outward. Yes, I know the picture is totally wrong in this regard. My bad! I forgot to take a pic at this point so this pic basically shows where to sew, but isn't completely accurate. You'll know you have it right when all the seams are matched up on the inside. Inner leg seams will be together.

Match the front/back seams together, pin and sew.
Pull one leg out from the other and make sure the pants are inside out. Fold over waistline hem and iron in place. Fold it over again and iron and pin in place.
Sew the upper hem in place leaving an opening of about 1" for inserting an elastic in the waistband.
 Now to insert the waist band! I generally use a 1/2" elastic waistband and a large safety pin. Insert the safety pin through the end of the elastic and push it through the opening. Thread the safety pin all the way through until it comes out the opposite end.
Readjust the fabric so that it is evenly distributed and the waist is not too tight. Sew the elastic together with your machine and backstitch or simply hand sew. Stitch the opening shut.
Turn the pants right side out and give them a quick iron and you're done!
Use this baby clothes pattern to make pants galore!
Get Creative With This Baby Clothes Pattern!
There are lots of ways you could get creative with this baby pants pattern. You could add a ruffle or lace trim. You could add pockets or patches!
 I decided to make a pair in this cute bright green corduroy I found on clearance. I had a fabric that matched them perfectly right down to the theme (it was a green woodland theme pattern). So I decided to add a super cute cuff to the bottom of the pants!
I wanted to show you how easy this would be.
To begin, the cuff should be sewn on at the very beginning of the baby pants sewing project, right after you cut the fabric with the baby clothes pattern, and before you sew the bottom hem of the pants. Just an FYI - I used a serger when I made these pants, but it is absolutely not necessary! A regular sewing machine will work fine as well.
 To start I cut a rectangle of fabric that was slightly longer than the bottom hem of the pants and wide enough to fold over once. To do this I used a quilting ruler and folded my fabric in half to cut two rectangles at once. You could easily freehand cut them, or just cute a paper rectangle at the right size and use it as a pattern.
Fold each fabric rectangle in half (width-wise) and iron the fold in place. Pin the folded rectangle so that the rough edges are matched up at the bottom hem of the pants. The right side of the fabric should be facing the folded cuff fabric. Sew the cuff to the hem with about a 1/4" seam allowance.
 Turn the pant leg right sides together with the cuff folded up inside. Sew the inner leg seam with the cuff in place. Trim any excess fabric and go on with the project following the rest of the instructions above.
I think these cuffed pants came out super cute! What do you think?
Make Your Own Baby Stuff Homepage > Make Baby Clothes > Baby Clothes Pattern: Baby Pants


Fun Projects and Tutorials