 |
||||
|
Use Paper Piecing To Make Your Own Nursery Wall ArtYou can make your own baby nursery wall art even if you consider yourself not to have any artistic talent. You can create some great baby nursery crafts using a technique called paper piecing. Anyone can do it! And the art you create will look like a pro did it!
One of the easiest ways for someone to create this kind of art is to use a pattern. There are a couple of ways to go about using a pattern for paper piecing projects. You can either print the pattern straight onto the papers you will use for the project, or you can print the pattern onto plain paper and cut the pieces out. After you cut the pieces out you just trace them onto your decorative paper and then cut those pieces out. 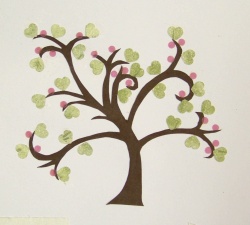 After you have cut the pieces from the decorative paper, arrange them all together to create your picture. Use a glue stick or the adhesive of your choice to stick them all together. You can glue them onto a separate piece of paper to frame to create nursery wall art. Or you could even mount them to create great canvas wall art. Try to think outside of the box with this. You could get really creative nursery wall art with this!
You do not necessarily have to use a pattern to create these kind of projects. Say you have found a picture in a book or magazine that you really would like to create some baby nursery wall art in the same sort of theme. Well, I can tell you how to create a pattern yourself. It's Easy! Go out and get yourself a pad of tracing paper. Lay the paper over the picture you want to create. Now, you are not going to simply trace the picture. It's a little more complicated than that, but still really easy. What you want to do is trace each shape on the page individually. So, say the picture is of a cute gingerbread house and tree
If you want the nursery wall art to be bigger, or even smaller, just take the pattern to a local copy shop (or even use the library copier) to reduce or enlarge the picture as needed. Now one thing I gotta tell you, when your cutting these shapes - it is almost impossible to cut them out perfectly. Don't worry about it. The shapes do not have to come out perfect. In the end, when you piece all of the paper together it will look great, regardless. Some of the paper piece projects I show on this page actually came from the Better Homes and Gardens Scrapbook Etc... website. They have a good collection of paper piece patterns for download. You will have to register with the site to use them, but that's no biggie, just opt out of their newsletter and stuff. The monarch butterfly and cute tree are creations of my own. You can download them right here! Monarch butterfly paper piece project for baby nursery crafts Tree paper piece project for baby nursery crafts
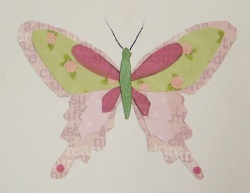 For the Butterfly I pieced together several decorative scrapbooking papers. I used a pink vellum for accents on the wings, and glitter cardstock for the butterfly body.
For the tree project I printed the pattern I created onto brown cardstock. I cut the tree out and glued it down to some cardstock. I used a small heart shaped paper punch to make the leaves, which were punches from a decorative green patterned scrapbook paper, and the berries were made using a small hole punch. I punched them out of pink vellum. To let you in on one more little secret, you can create these paper piecing nursery wall decor projects even more easily using decorative paper punches. You can create entire scenes using almost nothing but paper punches. Use flower shapes, and hearts, and decorative border punches to create shapes. Use your imagination! It's one of the easiest ways to create one of these paper piecing projects.
go from DIY Nursery Wall Art back to DIY Nursery Decor |

|
|||
 You can get really creative with this kind of craft. Try using different decorative and patterned papers to put your paper piecing project together. This gives it an interesting effect and texture. You can even go a little further and use fabric or felt instead of paper. This will make for some really interesting baby nursery wall art.
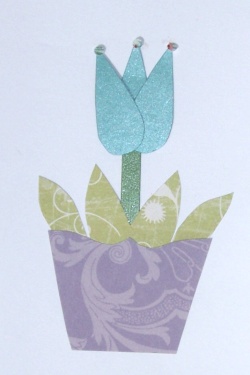 and sun, etc... First trace the house outline, then move the paper over a bit, trace the windows, move the paper over, trace the door, move the paper, and keep going like that. So that you have a separate shape for each and every part of the picture. Viola! There';s your pattern! Now either print it onto several colored and patterned paper (make sure and print onto the back of the paper, not the decorative side). Cut all of the shapes out and piece the paper back together to form the picture. It will look great!


Then why not use the button below, to add us to your favorite bookmarking service?
