 |
|||||
|
Make Your Own Baby Book
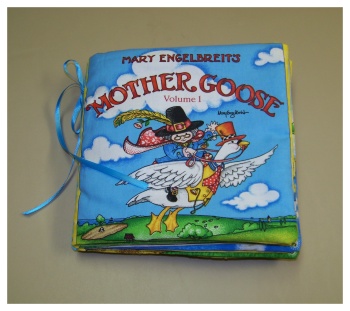
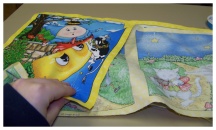
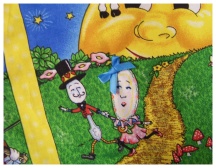
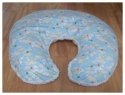
What makes this baby book project super easy is that the fabric you use to construct it is made especially to become a soft cloth book. All of the pages are laid out for you on the fabric, complete with cut lines, and instructions. It even has page numbers so you can easily keep track of where you should be sewing, and how the book is supposed to be put together. I think a lot of fabric stores may carry this kind of baby book project, but I actually bought mine at Walmart. They had a selection of about 4 or 5 different books to make. I chose the "Old Mother Hubbard" nursery rhymes book. It is so cute. I just have a thing for old nursery rhymes anyway. Besides that I also have another few yards of some fabric I bought that matches this book to a T. Makes for a great matching set baby gift. I can make an outfit to match the book, or nursery curtains, or baby pillow. Anyway, the book I chose was by Mary Englebreit - the VIP Library. If you want to find this book to make yourself there were two website addresses printed on the fabric by the directions. They were www.maryengelbreit.com and www.CranstonVillage.com 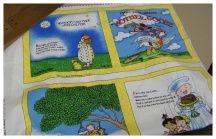
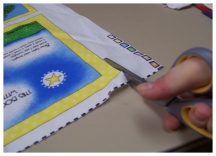
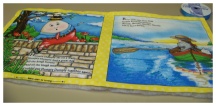
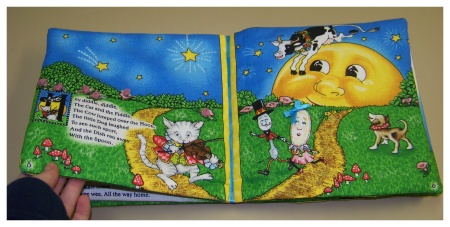
So you might be wondering, if the book comes ready to sew with instructions and everything, then what do you need me for? Well I'll show you. I took this project and pushed the envelope just a little. Yeah these baby books are cute on their own, but they needed something. So I used some of my own creative ideas to make these books interesting. Not only to babies, but to adults as well. Give one of these babies (baby books that is) as a gift and you're sure to impress. The How-To Sure there are instructions with this kind of baby book but I am going to go over them anyhow. Besides, there came a time while making this baby book that I had to abandon the directions anyway. I almost broke my sewing machine! I kid you not. The needle actually bent! I'll let you know where to veer away from their directions. I promise. Start by using some good sharp fabric scissors to cut the book pages from the fabric. Cut right along the black lines on the outside of the pages. I actually cut just inside of them to ensure that no black lines would show through anywhere. Be sure to keep the sewing directions at the bottom of the fabric intact. Once the pages are all cut from the fabric, it is good practice to iron them all out as well. Next you will want to also cut three pieces of lightweight to medium weight batting. Batting is the cotton filling people use in making quilts. It's like a flat sheet of cotton. First cut one piece to match the cover of the baby book. The cover is a tad bigger than the rest of the pages. Cut two more pieces to match the other pages. Lay down a piece of batting. Lay the cover piece on top of the batting, face side up. Next place pages 1/10 over the cover piece so that the face side is down. Pin these in place. After all pages are pinned together and to the batting as well, you must begin sewing. Notice that each and every page has a spot that says "leave open for turning". This spot must not be sewn shut. If the fabric baby book you choose to make does not have these words, then simply leave a 2-3 inch space open at the bottom of each page. Sew all four sides of the books shut with exception to the gap left for turning the book outside in. Use your fabric scissors to crop off all of the extra fabric off of the corners. Be careful not to snip any threads. Turn the books outside in. Get out your pressing iron. Try to pull all the corners out straight as you can. I usually use one of my pins to kind of dig out the corner all the way. Use the iron to press all the corners. To sew up the gaps left open for turning the pages you will need to use a needle and thread. Simple turn the edges in and hand sew each shut. Iron the pages fully once they are sewn up all the way. This is where I took it upon myself to add a little bit of my own creativity to the baby book. I took it from blah to WOW.
Here's what I did:
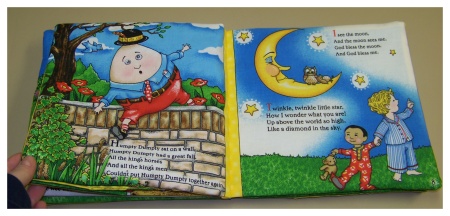
Drying the fabric glue only took about an hour. Maybe even less. Of course you cannot sew the book together while it is wet with paint. Once it is dry you will move on to sewing the book spine together. This is where I had to abandon the directions. Actually I tried to follow but that is how I almost mangled my beloved sewing machine. The directions will tell you to baste stitch the middle of the book and then machine sew it. The only problem is that the book is so thick that it just won't go smoothly through the sewing machine. After three failed attempts I just carefully hand sewed the book shut. This worked like a charm, and didn't take me all that long. I recommend that you pin the book together before you start sewing. You do not really have to worry about having a perfect looking stitch either. I came up for a remedy to the messy looking hand stitch when it comes to hand sewing baby books. I add a pretty matching ribbon to the spine at the end. It actually looks really nice. I would have added it even if my stitches were perfect. To attach the ribbon to the spine, just pick out a nice matching ribbon. Cut out a long length of it that is much too big, so you know you will have plenty. Wrap it inside the middle of the book and tie it in a bow on the outside spine. Make sure you tie it so it is mostly right close to the spine. Now use some fabric glue to hold it in place. I used the nozzle of the fabric glue to spread it on the underside of the ribbon. Press it in place with your fingers. If you like, you can sew the bow shut from the underside as well.
|

|
||||


Then why not use the button below, to add us to your favorite bookmarking service?