


Make a Mounted
|
This baby keepsake footprint project is relatively easy to create and is inexpensive to boot.In all it took me about an hour and a half to finish the entire thing. All together it cost me under $10.00 for the materials.
You can use this tutorial to make baby footprint or baby handprint crafts. They make wonderful keepsakes and even a thoughtful gift for grandparents and other family members.
 Materials needed to make the mounted baby keepsake footprint:
- piece of wood or a wooden plaque
- Sculpey clay
- decorative or scrapbooking paper
- decoupage finish or white glue
- (optional) ribbon
You will need a wooden plaque or even just a plain piece of wood to mount the footprint mold onto. I recommend buying a simple wooden plaque from a wood working store or art and crafts supply. I bought mine for under $2.
I like sculpey clay but really you can use whatever kind suits you best. Some clays will air dry, some need to be baked. You could even use plaster of paris that comes in a baby footprint or baby handprint crafts kit. Be wary of plaster of paris sold in cartons on its own. Many of these are not to be used in contact with skin. Be careful and read labels.
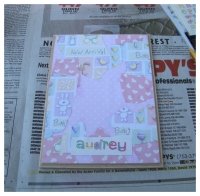
To start this project you will use decoupage medium to decorate your wooden plaque. If you like you can even just stain the wood and mount it as is, but I like adding lots of color and interest to my baby keepsake footprint projects. Decoupage is a process of layering paper and other materials and glue until you get a super smooth surface that is all fused together. You will need some decoupage finish or even just use simple white glue that has been watered down a little.
The process is simple. Pick out the decorative papers you want to use for the background to fuse onto your wooden plaque. You can even use fabric. Start by sealing the wooden plaque by either painting it or coating it with the decoupage finish. I sealed mine by painting a layer of decoupage finish over it. Wait for this to dry.
 Coat the back of the paper or fabric you wish to fuse onto your wooden plaque and stick it on applying gentle pressure. Be careful to smooth it out evenly and push out any extra glue or air bubbles. Wait for everything to dry.
After the paper has dried to the wooden plaque apply a coat of decoupage finish (or glue) to the entire plaque all over again. Wait for it to dry. Keep applying coats of decoupage finish (or glue) and allowing them to dry until the entire surface is perfectly smooth and glossy.
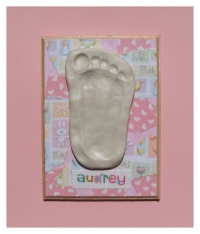
Now is the time to get out the sculpey and create the actual footprint (or handprint) to mount onto the plaque. Start by kneading the sculpey with warm hands until it is soft and pliable. Form the clay into a smooth ball and then press it out flat onto a table or work surface. Press your baby's foot or hand into the clay to create a print.
 If you like the clay to be shaped as a circle then simply leave it as it is. You can also use a craft or butter knife to trim some of the clay off. You can trim it into a shape too if you like. Depending on the clay that you decided to use, from here you may have to let it air dry or bake it in the oven. Follow the directions on the package of clay or plaster.
The last step is to attach the handprint or footprint. Use a glue gun to apply a bit of glue to the dry handprint or footprint mold. Press it onto the wooden plaque to attach it. Within minutes the glue should cool and harden leaving the mold in place and creating a really cool baby keepsake footprint or handprint.
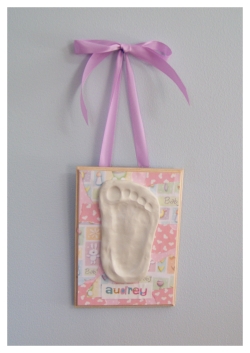
From here you can mount the plaque on the wall however you see fit. I used the glue gun to attach a pretty ribbon to the back of my plaque so that I could hang it from a pretty and colorful bow.
go from Baby Keepsake Footprint back to Baby Crafts page
back to Homepage