 |
||||
|
HOME
Site Contents
Free Baby Clothes Pattern:
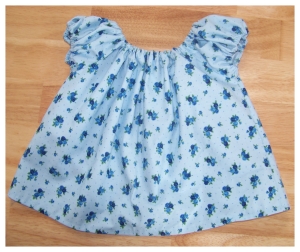
This peasant top baby clothes pattern is the perfect piece if your searching for a go-to, easy to make and versatile top for your baby's wardrobe.
|
||||
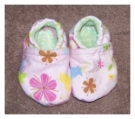
The printable patterns include from sizes 3 months up to 18 months. For larger sizes you can simply enlarge the pattern a bit more and take just a little bit of width off. This pattern is extremely forgiving if you don't have everything just perfect. Fantastic if your new to sewing! I recommend using about a half a yard of fabric, more or less depending on what size you choose to make. Don't worry - if you have a bit too much there are always other great uses for your left overs, like a pair of matching baby shoes, or a cute headband.
 Baby peasant top Sewing Supplies:
- about a 1/2 yard of fabric
- 1/4" wide elastic
- matching thread
Print out the free baby clothes pattern:
- 3, 6, 12, and 18 months peasant top pattern
- 0-3 months to print onto legal size paper or enlargement
Start by downloading and printing the baby peasant top pattern above. Print it onto regular white printer paper and then tape the paper together at the dotted lines to form the finished pattern.Cut out the pieces from your chosen fabric as specified per pattern piece.
Pin the pattern pieces to your chosen fabric. The pattern piece for the front and back of the peasant top should be placed on the fold of the fabric where specified on the pattern. Cut one front and one back piece, and two sleeves.

Place the front and back pieces together right sides facing in. Sew the sides together at the left and right, ending where the sleeves would start. Next meet the sleeve ends together with the right side facing in, sewing the ends together.
 Sew a casing to the bottom of each sleeve piece. To do this, first fold the end of the sleeve over about a 1/4" and iron in place. Fold the end over again by about 1/2" and sew this in place to form the casing for the elastic to slide through. You will need to leave a small opening to insert the elastic.
Pin the sleeves to the body of the peasant top with the right sides facing together. The seams on the inner part of the sleeve should line up with the seams sewn connecting the front and back pieces. Sew the sleeves to the body of the top.
 Now to hem the bottom of the top. Turn the bottom in by about 1/8 - 1/4" and iron in place. Sew the fold in place. Iron it over once again by folding in and ironing in place. Sew the hem in place.
Sew a casing to the top part of the peasant top. Fold the top down and inwards by about a 1/4" and iron it in place. Stitch this in place. Fold it over again about 1/2" and sew in the casing.
To finish thread the 1/4" elastic through the sleeves and top casing. The easiest way to thread the elastic through is to thread a safety pin through the end and then push the safety pin through the casing. To determine the length of the elastic I recommend doing a fitting or leaving an opening in the casing and securing the elastic with a safety pin for later adjustment. Otherwise pin the elastic where you want to sew it together. Overlap either edge of elastic by about a half an inch and sew together. Pull the elastic back into the casing and sew it shut.


Send Us Your Peasant Top Pictures!
Our readers sometimes send in pictures of their little cuties decked out in the new duds their Mama's sewed for them using our baby peasant top pattern. Check out all the inspiration and creativity!
Jen's Ruffle Bottom Peasant Top
by Jen, (Australia)
"I loved the top when I saw it on this website, so I downloaded a pattern :) It is such a cute little top, perfect for summer. Bring on those nice hot Aussie summer days!!! Thank you for sharing this pattern :)"
A Peasant Top For Ella

by Lauren Teunis, (St George, QLD Australia)
"This is my first attempt at sewing something from scratch for my daughter. I used two fat quarters so I didn't have enough to make a matching nappy cover but I plan to do so when I can get some more of this material. Very happy with how it turned out and can't wait to make some more in different colours. I absolutely love the puffy sleeves :-)"
Make Your Own Baby Stuff Homepage > Make Baby Clothes > Peasant Top Pattern


Fun Projects and Tutorials


